Introduction to Git, GitHub & Python
Overview
This week's lab will cover the following:
- Configuring your development environment.
- Using GIT for version control.
- Adding your code to a GitHub repository (repo).
- Using GitHub Codespaces.
- Creating your first Python script.
- Using comments to document your code.
- Using the print function to display a message.
Lecture Slides
Creating a GitHub account
Navigate to github.com and create an account (if you don't already have one) using your college email address. You may also wish to add your personal email address as a secondary one. You can change this to your primary email address at any time; which might be useful post graduation.
In the next steps you will be accessing GitHub classroom. You will also be using git with Visual Studio Code to push your code to github.com. These tools are all free, open source, and commonly used in programming.
Introduction to Git & GitHub
Use the following link to set up your access to the Introduction to Git & Github materials (provided by GitHub Classroom). Read through and everything before you continue. The purpose of this exercise is to familiarize yourself with Git & Github. To submit this, edit the instructions (README.md) by clicking on the pencil in the top right corner. You may wish to complete any of the additional items under Optional next steps. You are required to add your name and a short bio to access the Student Developer Pack which comes with free access to a ton of useful industry tools and services.
You may want to install the GitHub mobile app. It allows you access to your GitHub profile and repos from the comfort of your smart phone. It also allows you to secure your GitHub.com account with two-factor authentication if you wish to. You can install it for Android or iOS.
Creating your Github Repo for your Introduction to Python
Use the following link to set up a GitHub repository. You will be using this to write a simple hello world Python script.
Next, you will set up your development tools (Visual Studio Code or VS Code and Git). Follow the sections for setup on a Shared Computer by Accessing GitHub Codespaces or on your Personal Computer.
Shared Computer (ie College PC): Accessing GitHub Codespaces.
Once you have set up your Introduction to Python repository by following the link above (go back and do that if you missed it), you can access GitHub Codespaces from any browser on any device (PC, tablet, smart phone). Codespaces gives you access to Visual Studio Code, with direct access to your repository (without having to clone) from anywhere. It's perfect for a portable development environment. Login to GitHub (if you haven't already) and proceed.
You may have noticed in the link above you can click Open in GitHub Codespaces. Feel free to do so now. If you have already clicked past that window the next few steps will show you how to access it again (which is useful for future access attempts anyway). Click on <> Code and create a new codespace. Once you have created it, you can access it by clicking on the named link.
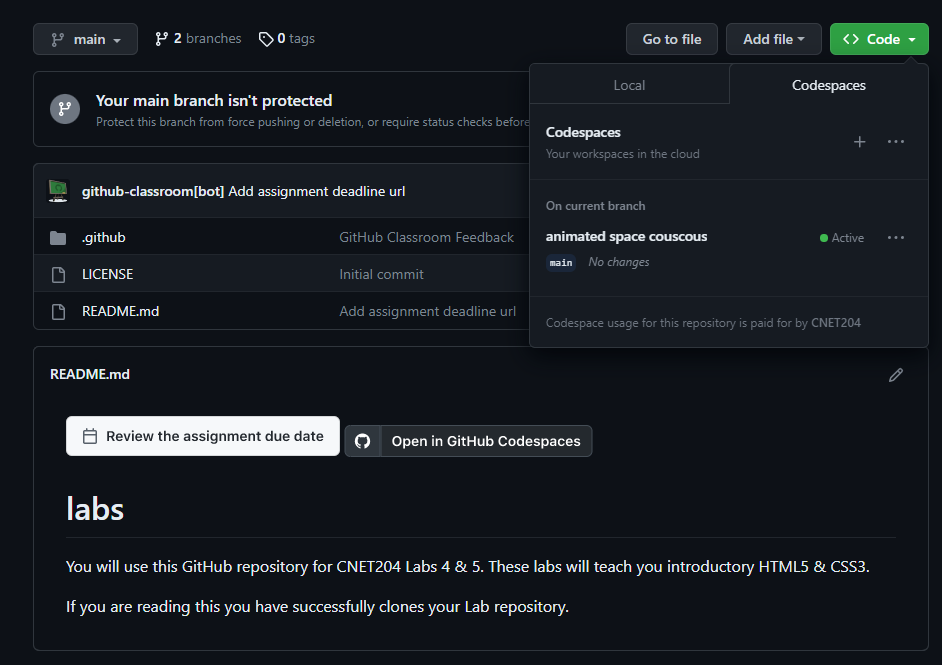
It may take a couple seconds to create your Codespace, but once it launches it is exactly like the interface in Visual Studio Code. That is because it is Visual Studio Code, running in an Ubuntu container in the cloud through GitHub. You get access to this completely free through GitHub Classroom. If you are working from a Shared Computer (ie a College PC), you can skip the Personal Computer set up below for now and proceed to Creating Your First Python Script. You may want to set up your Personal Computer with Visual Studio Code and Git later, but it is not neccessary.
Personal Computer: Downloading Visual Studio Code (VS Code)
The College PCs should all have Visual Studio Code and Git installed on them. You can login to your GitHub account using a college PC to do your lab as well (instead of using Codespaces). Watch the lab demonstration video on eCentennial to see how.
You will be using Visual Studio Code and Git to write Python scripts/programs. If you are working from home or your laptop however, you may want to install and configure both of these. If you are working on a PC at Centennial College, skip to the next section (configuring Visual Studio Code). You can download and install Visual Studio Code in the following ways:
- From the Visual Studio Code website.
- In Windows - From the Microsoft Store: search for vscode and click Install.
The Visual Studio Code website has installers for Windows, Linux (Debian and Red Hat based) and macOS.
Configuring Visual Studio Code & Git
Visual Studio Code (VS Code) is a powerful editor designed for programming and scripting. It is open source and available for free. It also works cross-platform, meaning you can install it in Windows, macOS or Linux. Additionally, it has source control tools for git and GitHub built-in. Launch Visual Studio Code, click on Source Control on the left and click the Download Git link unique to your operating system (see the following screenshot).

When you're installing Git, accept the defaults except for Choosing the default text editor used by Git. Select Use Visual Studio Code as Git's default editor from the dropdown (screenshot below).
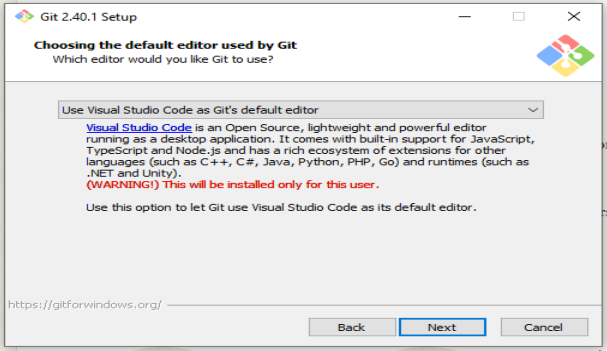
Once the installation is finished you will have to close and re-open VS Code to access Git.
Cloning Your Repository in VS Code
- In order to clone your repository in VS Code, you need to first sign in with GitHub. Open VS Code and click the profile icon in the bottom left. It is located directly above the settings (gear) icon. Sign in with GitHub.
- Next, click on Source Control and click Clone Repository. Select Clone from GitHub in the url bar, and select the CNET232/hello-world-youruser repository.
- You will now select the local folder to be used as your Repository Destination. If you are working on a PC at the college, set this to your H drive. If you are working from your own PC, set this to a folder of your choosing (but remember where it is). The advantage to using your H drive on a college PC, is it is automatically mounted on any PC you log into. Additionally, you can access your H drive through myCentennial.
You may be prompted to sign in. Accept any other prompts, including opening the repository locally and select:Yes, I trust the authors.
Configuring File EOL (End of Line) Settings
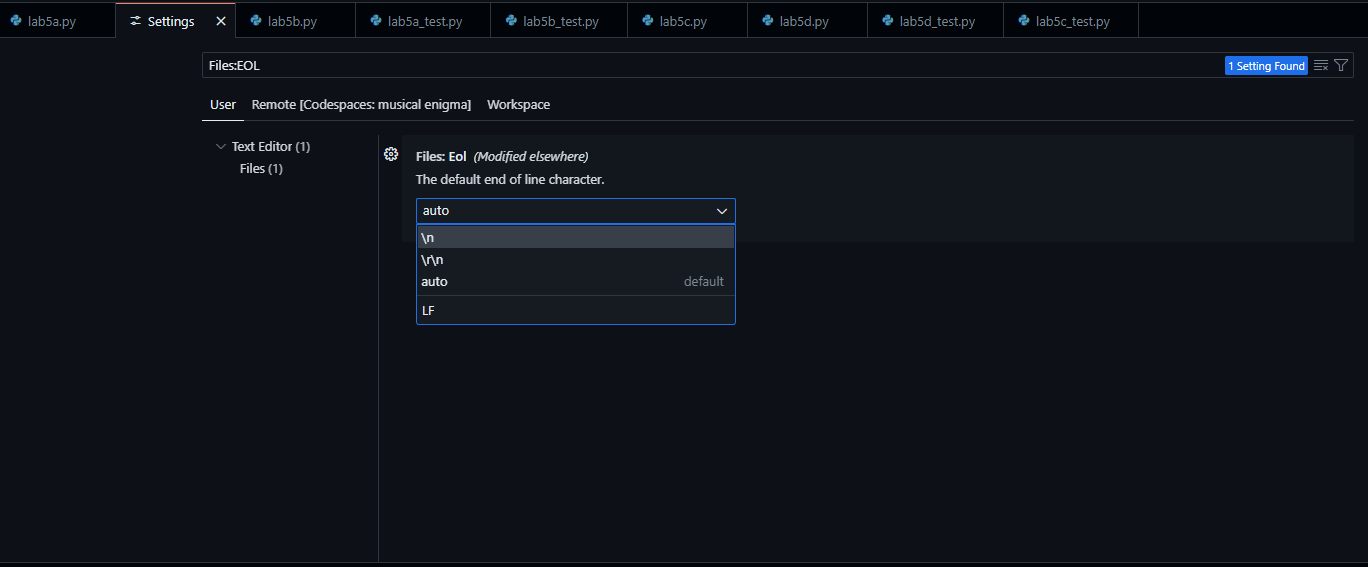
When working with git, it is important to configure your EOL settings. This is because Windows and Unix-based systems (like Linux and macOS) use different characters to represent the end of a line. Windows uses \r\n (carriage return, line feed) and Unix-based systems use \n (line feed). If you are working on a Windows PC, you should set your EOL settings to LF (line feed) to avoid issues when pushing your code to GitHub. To do this:
- Click on the gear icon in the bottom left of VS Code.
- Search for eol and select Files: Eol.
- Set the Default Eol to \n.
Interactive (learning) mode: using the Python Interactive Shell
In this mode, you can instruct the Python Interpreter to execute python statement or python expression one at a time, call a function, or display the representation of a python data object. In GitHub Codespaces or Visual Studio Code (the process is the same), open a Terminal (if one is not already open) by clicking on Terminal > New Terminal. Start the Python version 3 Interactive shell, by typing the following into the Terminal in Codespaces.
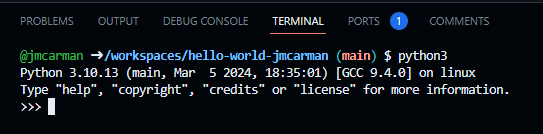
Note that when you see the >>> Python interactive shell prompt, which indicates that the Python Interpreter is listening and waiting to carry out your instruction written in the Python language. Try the following commands at the python command prompt, and record their outputs for future reference:
- copyright
- credits
- license
- help
The output of the last command should tell you how to enter the interactive help, or how to get help on a Python Object. You should see the following message when entering the interactive help utility:

Please note that the prompt changed from >>> to help>. Try the suggestion and feel free to explore the interactive help utility. Simple press the **Enter** key to get out of the interactive help utility.
At the >>> prompt, type dir() to call the built-in function named dir without passing any function argument to it. The dir() function will return a list of data object names known to the Python interpreter at that moment. You should get a list of items similar to the following:
	>>> dir()
	['__annotations__', '__builtins__', '__doc__', '__loader__', '__name__', '__package__', '__spec__', 'x']
	>>>
We are interested in the object named __builtins__ at this moment. We can ask the Python interpreter to tell us more about the __builtins__ object by passing its name __builtins__ as the function argument to the dir() function:
	>>> dir(__builtins__)
	['ArithmeticError', 'AssertionError', 'AttributeError', 'BaseException', 'BlockingIOError',
	...
	ValueError', 'Warning', 'ZeroDivisionError', '_', '__build_class__', '__debug__', '__doc__',
	'__import__', '__loader__', '__name__', '__package__', '__spec__', 'abs', 'all', 'any',
	'ascii', 'bin', 'bool', 'bytearray', 'bytes', 'callable', 'chr', 'classmethod', 'compile',
	'complex', 'copyright', 'credits', 'delattr', 'dict', 'dir', 'divmod', 'enumerate', 'eval',
	'exec', 'exit', 'filter', 'float', 'format', 'frozenset', 'getattr', 'globals', 'hasattr',
	'hash', 'help', 'hex', 'id', 'input', 'int', 'isinstance', 'issubclass', 'iter', 'len',
	'license', 'list', 'locals', 'map', 'max', 'memoryview', 'min', 'next', 'object', 'oct',
	'open', 'ord', 'pow', 'print', 'property', 'quit', 'range', 'repr', 'reversed', 'round',
	'set', 'setattr', 'slice', 'sorted', 'staticmethod', 'str', 'sum', 'super', 'tuple',
	'type', 'vars', 'zip']
The above output shows a list of the so-called built-in run-time error codes and built-in function names. We are going to learn how to use them effectively in order to save our coding effort when writing Python programs/scripts. Lets start with the following built-in functions:
- print()
- help()
- type()
You can learn more about the above built-in functions within the Python interactive shell. Study the output of the following commands at the >>> prompt and keep a record of them for future reference:
>>> help(help)
>>> help(print)
>>> help(type)
>>> type(type)
>>> type(help)
>>> type(print)
Creating your first Python script
Comment block
Using GitHub Codespaces (or Visual Studio Code), open the hello.py template in your introduction to Python repository that was provided when you accepted the assignment through GitHub classrooom (above). You should see the following code in your editor.
	#!/usr/bin/env python3
	# Author:
	# Date:
	# Purpose: Print "Hello World!" to the screen
	# Usage:
	#

	# Use the print command to write "Hello World!" on the screen
A script should be properly documented using comments. Comments are not executed by the interpreter, but they can be used to make your scripts easier to understand. Comments in Python begin with the # character. Any text following will be ignored when the program is run. Additionally, scripts or programs should contain a comment block at the top detailing things like:
- The Author (and contact information)
- The date the script was created
- The script's purpose
- Sample usage
Fill in the following (sample provided below)
- Author: Your name; youremail
- Date: The current date
- Usage: ./hello.py
	#!/usr/bin/env python3
	# Author: Jason Carman; jcarman1@my.centennialcollege.ca
	# Date: March 15, 2024
	# Purpose: Print "Hello World!" to the screen
	# Usage: ./hello.py
	#
The print function
The built-in print function is extremely useful for displaying messages to the user who is executing the script. In the context of this course, that will always be you. In industry however, this is not always the case. You can use the print function to display text to the user telling them a process is starting, or to print out the contents of a variable for debugging purposes. Print uses the following syntax. You can include a \n to print a new line.
print("Your message goes here\n")
To do:
Using the above sample, use the print function to display the message Hello World!. This code should go below the corresponding comment in your template.
Running your script
In GitHub Codespaces or Visual Studio Code (the process is the same), open a Terminal (if one is not already open) by clicking on Terminal > New Terminal. Before you can run your script, it must be given execute permissions. To make your Python script executable by you (the user) only, issue the following command.
chmod u+x hello.py
Now you can run your script in the terminal by issuing the following command.
./hello.py
You should see the message Hello World! displayed on the screen. Save your file. Note: In GitHub Codespaces, you do not need to save your file.
Using the automated check script to confirm output
Since every script you write in this course will autograde, you will want practice using the check script to confirm the output is correct before you push your code to GitHub. When you push your commit to submit code, GitHub Classroom will run the check script and award marks accordingly. The check scripts will always be the name of the lab_check.py. For example: hello_check.py for this script. To view the output of the check script in codespaces, open a terminal and issue the following commands:
chmod +x hello_check.py
Then run the check script:
./hello_check.py
You can confirm the check script passed by viewing the status code from the command line (terminal) in Codespaces). If you see a 0, it passed and the check script will award marks properly when you push your commit. If you see anything else, you can use the error message on the screen and double check the lab instructions to see what you missed.
echo $?
Setting your git username and email
Skip this step if you are using GitHub Codespaces, and proceed to Making your first commit.Before you can push your commit to GitHub, you need to set your username and email (to be included in the commit) from the command line within VS Code. To do this:
- Click on Terminal (in the menu bar across the top of VS Code).
- Click New Terminal.
Then issue the following two commands:
	git config user.name "Your Name"
	git config user.email "youremail@my.centennialcollege.ca"
If you are using your personal computer, you may include the --global option to set these semi-permanently.
Making your first commit
Congratulations! Your have created your Python script. You can now commit it to your github repository. To do this:
- Click on source control (on the left side of the screen).
- Click the three dots at the top of the pane.
- Click Changes and select Stage All Changes.
- Then click Commit.
- Enter a commit message (a short message describing what you have changed) and click on the check mark in the upper right corner.
- Click save when prompted.
- Click Sync Changes at the top of your Source Control pane, and agree to any prompts.
You've made your first commit! You will be doing this many times over the course of the semester. It will get easier with repetition.
Completing the Lab
Your script should produce output similar to the following. If it does not, go back and complete whatever you've missed.
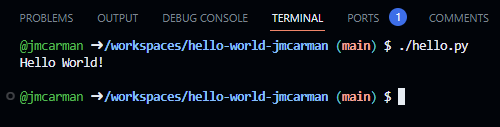
Upon completion of this lab you should have set up your development environment (VS Code & GitHub) and written a simple Python program using the print command. To submit your lab you need to submit the code to your GitHub repo (which you did in already in the lab).
Exploration Questions
The following questions are for furthering your knowledge only, and may appear on quizzes or tests at any time later in this course.
- What is Python?
- What does the she-bang line do?
- What built-in function is used to display content on the screen?
- How do you execute a Python script?
- In git, what does cloning your repository do?